local_shipping

Official LTA Rebound Target · Fast delivery from our UK, EU and US warehouses

arrow_backDiscover!

Get started. Play safe.

Set up your TargetBound, find its place on court and get ready to play. Read the guidance below before you start.

Before you play

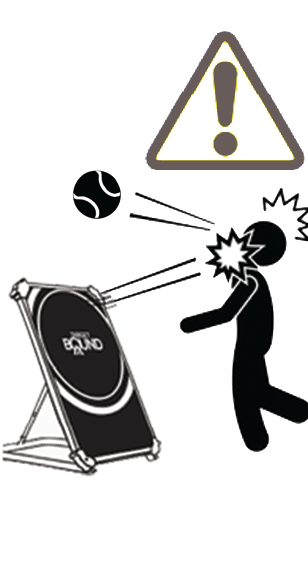
Fast rebounds and keeping clear pictogram

Fast rebounds and keeping clear

Balls rebound fast and can fly off the target in any direction, especially when they hit an edge. Being hit can cause serious injury, including eye injury.

Keep the area around the target clear. Never stand beside or behind it during play.
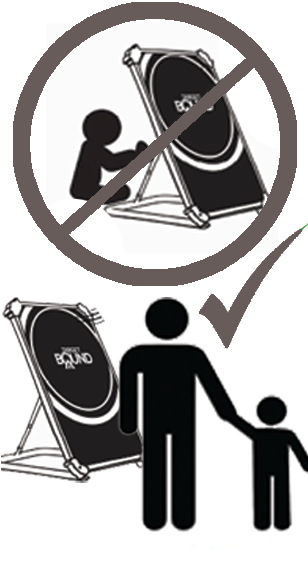
Adult supervision pictogram

Adult supervision

Not a toy. Anyone under 18 must be supervised by an adult.

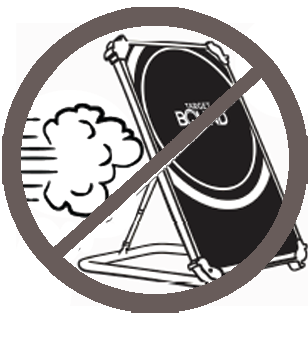
Wind pictogram

Wind

Do not use in strong or gusty wind: the target can tip over.

Do not leave it set up and unattended if strong winds are forecast. A sudden gust can blow it over or move it across the court.

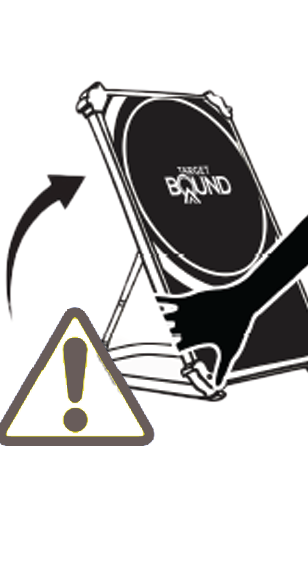
Setup and moving parts pictogram

Setup and moving parts

An adult sets up and adjusts the target. Keep fingers clear of the hinge and moving parts and make sure the adjustment is secure before play.

Start with gentle shots after any adjustment.

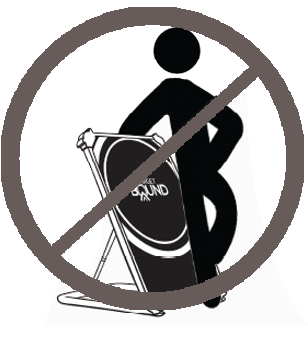
No climbing pictogram

No climbing

Do not climb, sit or stand on it.

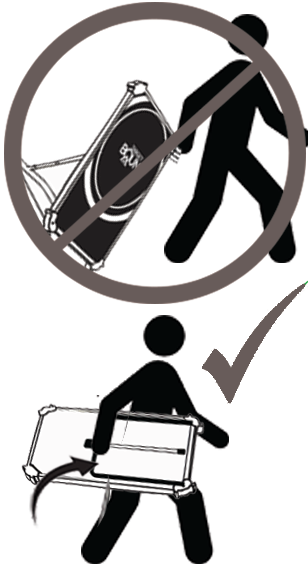
Fold before carrying pictogram

Fold before carrying

Fold the target flat and make sure the leg is clicked in place.

Read these safety symbols on your TargetBound before use. Read the safety label in 27 languages ↗

Set up

Unfold your TargetBound, choose the return and link a second target if needed.

The coach unfolds the TargetBound and sets the extending leg.
  1. Check joints, bolts and moving parts. Look for burrs or sharp edges. Replace worn or damaged parts. Do not use a target that is damaged, loose or unstable.
  2. Unfold the target and set the extending leg to the preferred position.
  3. Adjust the angle for the return you want.
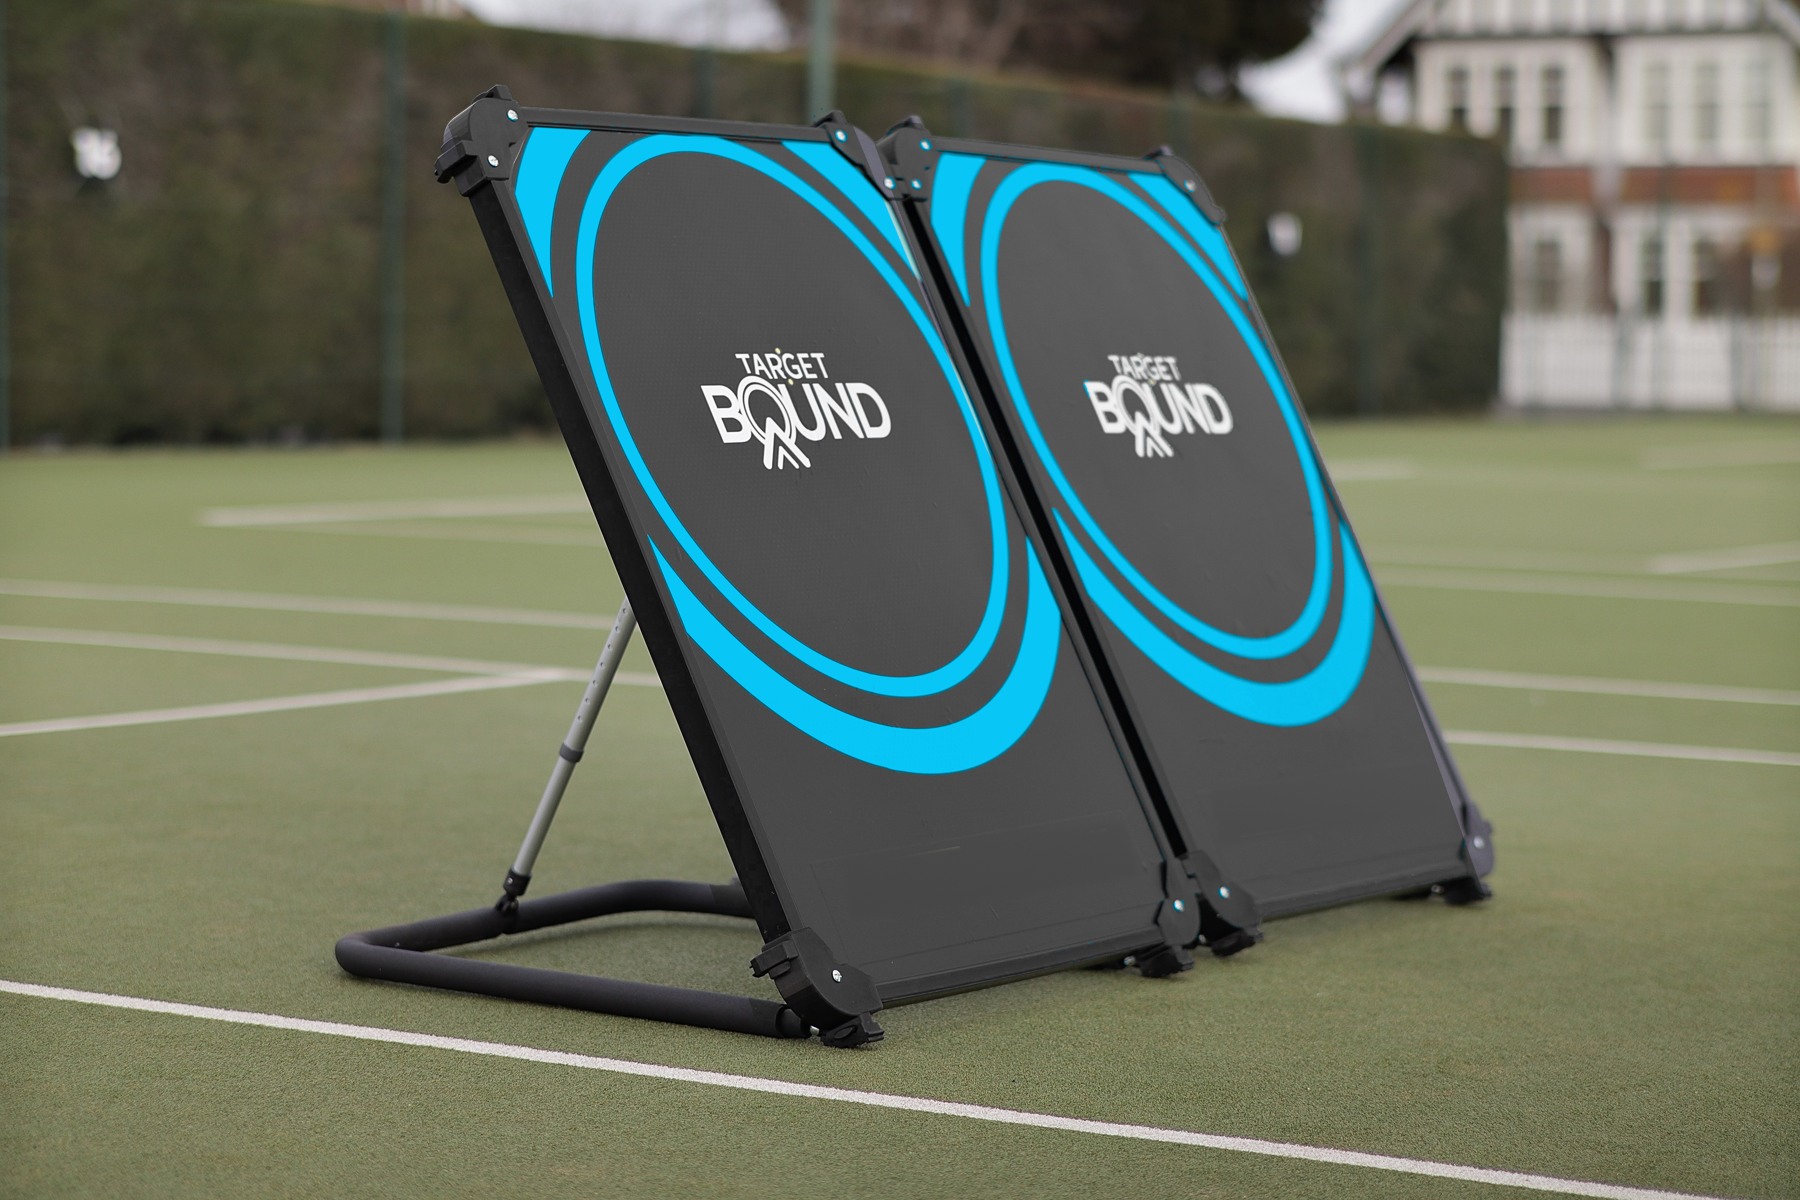
  4. To link two targets, set both back legs to the same angle. Use the D-shaped clip on the lanyard to join them side by side.
More detail: court conditions, linking and slow motion

Use on a flat, even tennis or padel court in good condition, with tennis or padel balls. Make sure the target is stable.

Two TargetBounds linked side by side on a tennis court

The D-shaped clip hangs on the lanyard. Unclip it and use it on the linkage. To unlink, reverse the steps.

Setup in slow motion

A slower view of unfolding the target and setting its support leg.

Position

Place TargetBound for the serve and the follow-up shot.

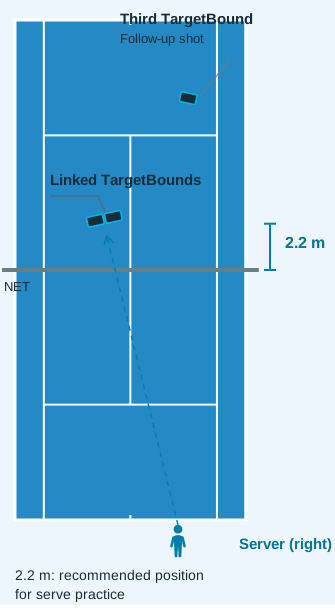
Two linked TargetBounds face the server across the net with a third TargetBound farther back for the follow-up shot.

Recommended position for serve practice

2.2 metres about 7 ft

The recommended position for serve practice is 2.2 m from the net, in line with the server.

It is not a safe distance for onlookers: keep everyone else well back.

The example shown

  • The server is on the near-right side of the court.
  • The linked pair faces the server across the net in this example.
  • The third TargetBound is for the follow-up shot.
Coach’s tip: seeing the target over the net

At 2.2 metres you won’t see much of the target over the net when you serve. When you toss the ball and hit it high above your head, the ball can see the whole target. Serve towards it as you normally would.

Play Safe

Agree where people will stand, then begin the drill.

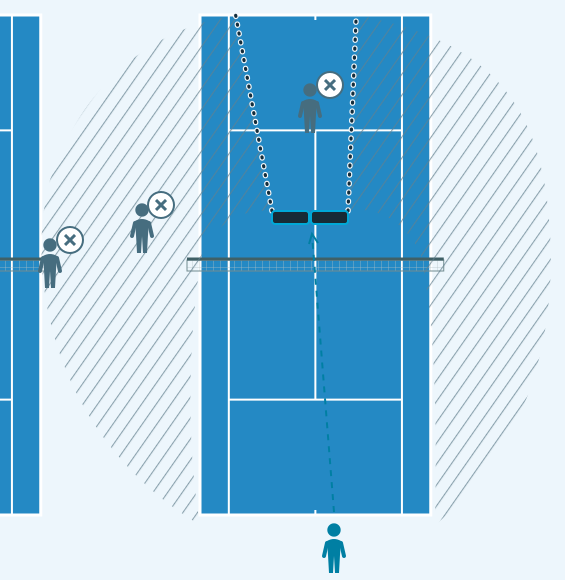
Court diagram showing linked TargetBounds, a near-right server, people beside and behind the targets and possible rebound paths
Server×People to keep clearRebound area varies with serve speed
  1. Coaches and supervising adults: before serving starts, tell players and anyone watching where to stand.
  2. Use one ball at a time and watch it. Stop serving before anyone goes near the target to collect balls or adjust it.

Coaches, schools and groups

  • Only one player hits at each target at a time. Waiting players and onlookers stand well back.
  • Where several targets share a court, arrange them so nobody stands beside or behind a target in use.

Carry and store

Carry TargetBound away and secure it between sessions.

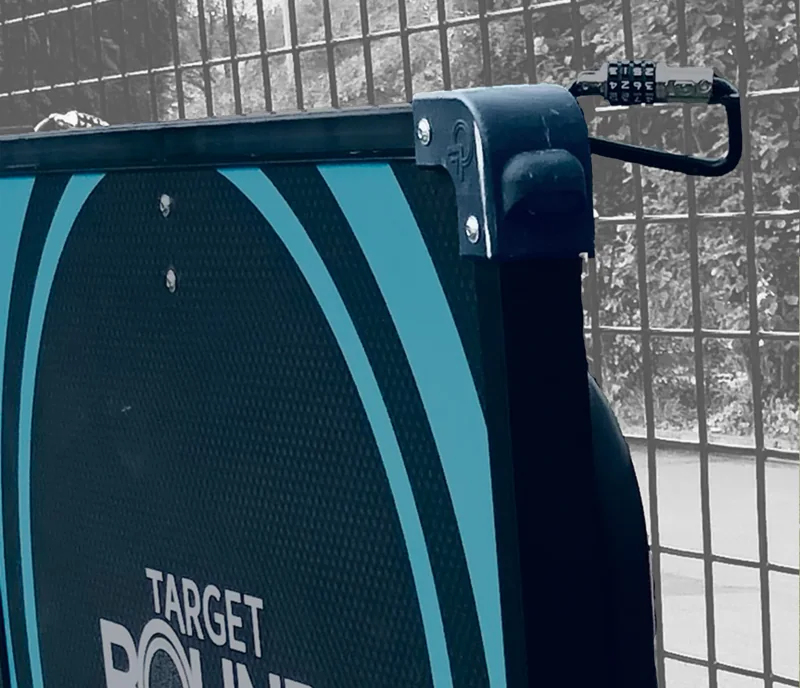
Combination padlock securing a TargetBound corner eyelet to a court fence
Corner eyelets allow court-side locking.
  1. Hold the leg to carry it. If it is too heavy, ask for help.
  2. In a car, lay it face upwards. Place nothing on top that could scratch it.
  3. Use the corner eyelets to secure it with a padlock to a fence or a suitable wall-mounted fixing, such as a hook or U-shaped bracket.

    When juniors are around, lock or otherwise secure the target when it is not in use to help stop them using it without adult supervision.

  4. If it is not secured, store it in a sheltered place away from strong wind and extreme weather. Keep it away from heat sources indoors.
More detail: carrying bag and care
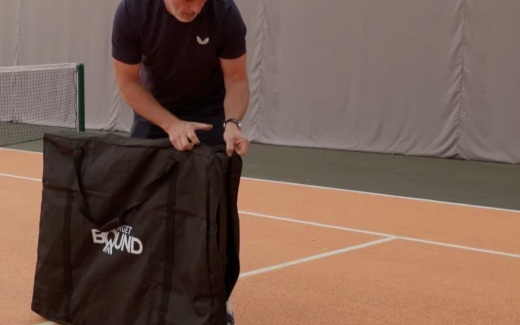
Close view of a coach opening the TargetBound carrying bag

The carrying bag keeps your folded target together between sessions.

Clean with a slightly damp cloth. Do not use corrosive or abrasive cleaners.

Help

More detail: reporting

If anyone is hurt using TargetBound, tell us: hello@targetboundsports.com

Now play.

Explore Discover’s drills and challenges for your next session.